

Views: 0 Author: Site Editor Publish Time: 2026-07-18 Origin: Site


Customizing portable power is becoming essential for modern electronics, robotics, and robust off-grid setups. Engineers and hobbyists constantly seek high-capacity solutions tailored to highly unique spatial constraints. Standard blocks often fail to fit inside sleek enclosures or complex mechanical frames.
Building a custom 12000mAh Lithium Battery offers immense configuration flexibility for these demanding applications. You can design the exact shape and weight distribution required. However, constructing such a powerful pack requires strict adherence to electrical safety standards. You must respect chemistry realities to prevent catastrophic failures during operation.
DIY battery building is not always the most practical route if you need to purchase specialized tools from scratch. Tooling investments often outweigh the savings of assembling raw cells yourself. This technical walkthrough explores the detailed build process. You will learn how to select premium cells, integrate management systems, and execute safe spot welding. We pair these technical steps with a realistic feasibility analysis to guide your final project decisions.
You need to evaluate the real Bill of Materials (BOM) before ordering any parts. A raw lithium cell might seem inexpensive at first glance. However, you must calculate the combined expense of premium cells, a robust Battery Management System, and pure nickel strips. Compare this aggregate material cost against highly reliable commercial units. Often, purchasing an off-the-shelf unit makes more economic sense for standard voltage requirements. Commercial manufacturers buy components at bulk rates, passing efficiency down to the user.
The hidden tooling barrier frequently skews the popular "cheap DIY" narrative. Proper assembly demands specialized equipment you might not own. You will need a capacitive spot welder, heat-resistant Kapton tape, heavy-duty shrink tubing, and insulating barley paper. These items elevate your initial investment significantly. If you lack these specialized tools, the custom route rarely saves capital. You are essentially paying to equip a small electronics lab.
Why choose the DIY path? Form factor customization remains the primary driver. Your project might demand a highly specific physical footprint. Electric skateboards, custom drone enclosures, or unique robotics chassis often reject standard block batteries. They require slim profiles or asymmetrical shapes. When standard commercial packs cannot meet these strict spatial constraints, building your own tailored pack becomes entirely necessary.
| Evaluation Criteria | DIY Custom Build | Commercial Off-the-Shelf |
|---|---|---|
| Initial Tooling Need | High (Spot welder, multimeter, insulation supplies) | None (Ready to plug and play) |
| Form Factor Flexibility | Unlimited (Can build flat, brick, or L-shapes) | Rigid (Limited to manufacturer designs) |
| Technical Knowledge Base | Advanced (Requires chemistry and circuitry understanding) | Basic (Requires matching voltage and plugs) |
| Safety Liability | Personal responsibility (Depends on builder skill) | Manufacturer warranty and factory testing |
Sourcing reliable cells forms the absolute foundation of your power supply. You must learn to spot fake capacities immediately. Avoid unknown brands boasting impossible numbers, frequently known as "ultrafire" traps. A single 18650 cell cannot physically hold 9000mAh. Stick to reputable manufacturers known for strict quality control. To achieve your target capacity, calculate your parallel array accurately. For example, wiring four trusted 3000mAh cells in parallel yields a genuine 12000mAh output. Adding more cells in series will multiply the voltage, but the parallel group dictates the capacity.
The Battery Management System acts as the brain of your pack. It manages safety, longevity, and charging logic. You must match the BMS amperage rating to your expected continuous load. The BMS represents the critical failure point in most amateur builds. Incorrect wiring or undersized ratings lead directly to system shutdown. In worse scenarios, a bypassed BMS allows deep depletion, permanently destroying the cell chemistry.
Required hardware goes far beyond simple wires and tape. You need dedicated assembly tools to ensure structural integrity and electrical efficiency.
Best Practice: Fire Safety Protocols
Working with high-density energy storage carries inherent risks. Always keep a Class D fire extinguisher nearby, as standard water extinguishers cannot extinguish lithium fires. Work on a clean, non-conductive surface away from flammable materials. Wear protective safety glasses during all spot-welding phases. Never leave charging or balancing cells unattended.
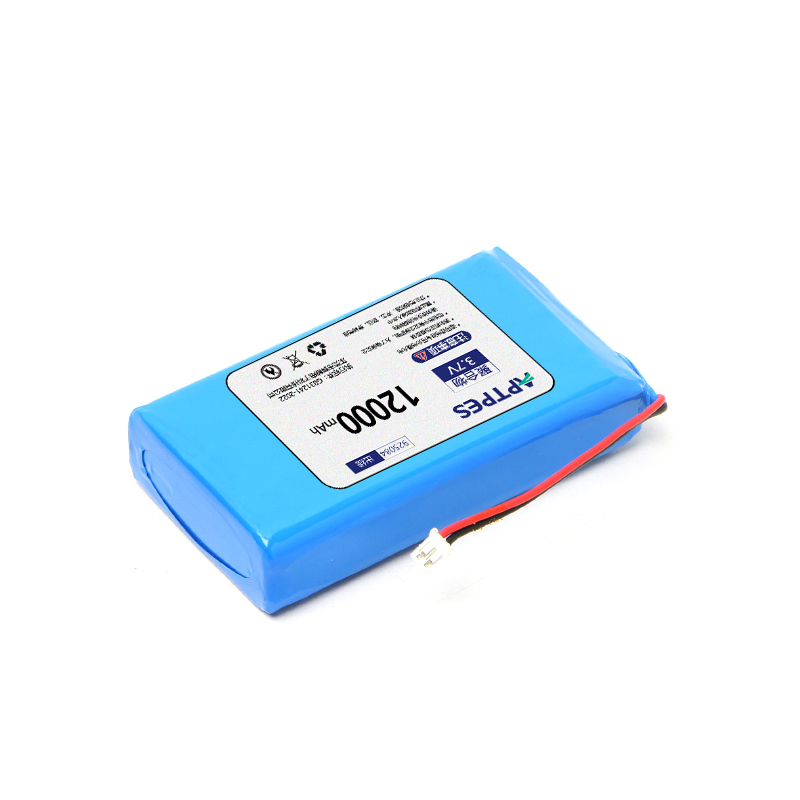
Creating a functional 12000mAh Lithium Battery requires strict procedural discipline. Rushing the assembly process guarantees poor performance or creates serious hazards. Follow this sequential execution framework to ensure optimal current flow and maximum safety.
Common Mistake: Many beginners cross balance wires over sharp nickel edges. Over time, friction wears through the thin silicone wire insulation. This creates a hard short across the pack. Always route balance wires safely through the middle valleys of the cells.
Assembly completion does not mean the power source is ready for deployment. You must verify all voltage and capacity parameters carefully. Use your digital multimeter to check the final output at the main discharge leads. It should exactly match the expected mathematical total of your series arrangement. Next, connect a dummy load tester. This allows you to confirm the pack handles real-world current draw and genuinely meets the required capacity threshold.
Thermal monitoring during the first charge cycle is crucial. Place the pack on a fire-safe surface. Initiate the charge and monitor it constantly. You should observe the pack closely for any localized heat generation. A properly built pack stays relatively cool during standard charging. Ensure the management board actively cuts off incoming power at the exact maximum voltage limit. If it overcharges even slightly, you have a flawed BMS connection that requires immediate troubleshooting.
Final packaging protects your intricate internal work. Once testing passes, wrap the completed pack in heavy-duty PVC heat shrink tubing. Add dense neoprene foam padding around sensitive corners or exposed wire exits. Use a heat gun on a low setting to shrink the PVC evenly around the cells. This finishing step provides necessary structural integrity. It actively shields your internal spot welds from moisture ingress, dust accumulation, and mechanical vibration.
Deciding between constructing or purchasing a power source involves evaluating your specific constraints, available time, and mechanical confidence. There is no single correct answer, but understanding your exact project parameters makes the choice obvious.
Build it yourself if you already own a reliable spot welder and electrical tools. DIY makes perfect sense when you require a highly non-standard shape to fit a custom chassis. For example, fitting power into the curved down-tube of a custom e-bike frame demands bespoke battery geometry. It also works well when you need highly specific, sustained discharge rates for high-drain robotics or competitive radio-controlled applications.
Buy off-the-shelf if your project only requires standard outputs. If you lack prior electrical experience, purchasing is vastly superior. Commercial units provide immediate deployment. They ensure safety liability coverage, warranty protection, and rigorous factory testing. You avoid the entire tooling barrier.
If you decide to proceed with the build, your next step is sourcing authentic cells from reputable distributors. Avoid marketplace resellers and buy directly from battery specialists. If you pivot to purchasing, begin evaluating commercial specifications. Look closely at their listed continuous discharge ratings and internal BMS protections to ensure they meet your hardware requirements.
Constructing a custom power supply balances the thrill of tailored engineering against the unforgiving nature of lithium chemistry. It demands deep respect for safety protocols, precise execution, and quality materials. Building a custom pack is highly achievable when you possess the right tools and theoretical knowledge. However, taking shortcuts on terminal insulation, ignoring cell balancing, or skipping management board integration inevitably leads to critical project failure.
Evaluate your real needs honestly before buying raw components. Measure your physical space constraints. Assess your willingness to invest in specialized tools. Choose the path that guarantees reliable, long-lasting power for your specific application without compromising personal safety.
A: It depends on the capacity of the individual cells you select. If you use high-quality 3000mAh 18650 cells, you need four cells wired in parallel to achieve exactly 12000mAh. You then multiply this parallel group by your required series count to hit your target voltage (e.g., a 12V pack needs 3 groups of 4 cells, totaling 12 cells).
A: No. Soldering directly onto lithium cells is highly dangerous. The sustained heat from a soldering iron degrades internal chemistry rapidly. More importantly, excessive heat can melt the safety vents located under the positive terminal, leading to chemical leaks, thermal runaway, and potential fire hazards.
A: Buying is usually cheaper for a one-off project. The hidden cost of a DIY build includes purchasing a spot welder, pure nickel strips, and insulating materials. If you already own these tools, building your own pack can save money, but the initial tooling barrier makes commercial packs more economical for beginners.
A: Operating without a Battery Management System guarantees failure. Without it, your device can drain the cells below their safe voltage threshold, permanently killing the chemistry. During charging, a lack of BMS allows overcharging, which physically expands the cells and frequently triggers violent thermal runaway and fires.


